For more details on individual Character settings, refer to these pages:
https://helpx.adobe.com/illustrator/using/fonts.html https://helpx.adobe.com/illustrator/using/formatting-type.html https://helpx.adobe.com/illustrator/using/line-character-spacing.html https://helpx.adobe.com/illustrator/using/add-advanced-formatting-to-text.html https://helpx.adobe.com/illustrator/using/special-characters.html
Within that section of the Control or Properties panel is the paragraph, and more options can be found when you click the word Paragraph or the Paragraph panel as you require them for more specific alignment of text, and how changing from left to center may improve the layout of the text within a custom shape. Refer to Figure 8-158.
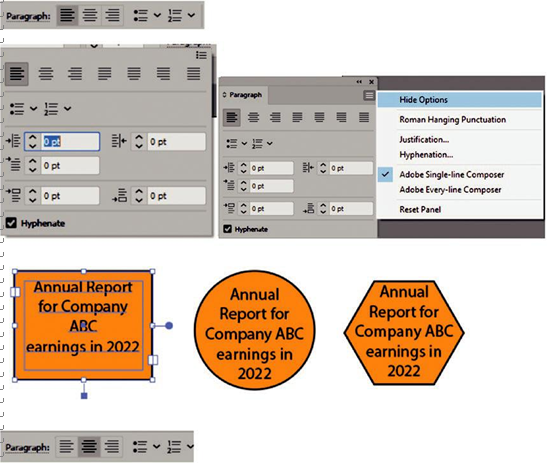
Figure 8-158. Use the Control panel to set your Paragraph settings or the Paragraph panel to align text from left or right to center
Keep in mind that this area may appear differently if you are using vertical text. In this case, we are focused on the horizontal text. In the Control panel, you can use the main types of alignment, such as left, center, and right. You can also choose options for bullet shapes and number list bullets. By default, they are set to none, but you can set another option using the drop-down list and access further options under the ellipsis icon (…). Refer to Figure 8-159.
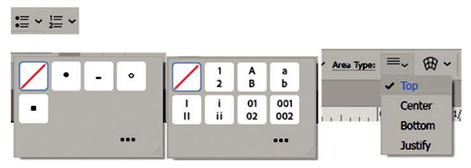
Figure 8-159. Use the Control panel to add bullets or numbered lists to your text and Area Type Options
You may also have access to the Area Type Options and related alignment options (top, center, bottom, justify).
For more details on the Paragraph panel and Bullet options, you can refer to the following links:
https://helpx.adobe.com/illustrator/using/bullets-numbering.html https://helpx.adobe.com/illustrator/using/formatting-paragraphs.html
Tip After working with your Character, Paragraph, OpenType, and Glyphs panels, while no type is selected, make sure to use the panel’s menu to reset so that it goes back to its default settings for your next project. Refer to Figure 8-160.

Figure 8-160. The reset menu on Character, Paragraph, OpenType, and Glyph panels to reset the font back to its base settings
The next section of the panel allows you to warp a selected type with Warp Options or create your own custom mesh (Make with Mesh). We will not be going into any detail on this topic, but if you’re interested, you can refer to the following dialog box; as well I have written a book on this topic for Illustrator, which is mentioned in the introduction for those that are interested in these warping options. Refer to Figure 8-161.
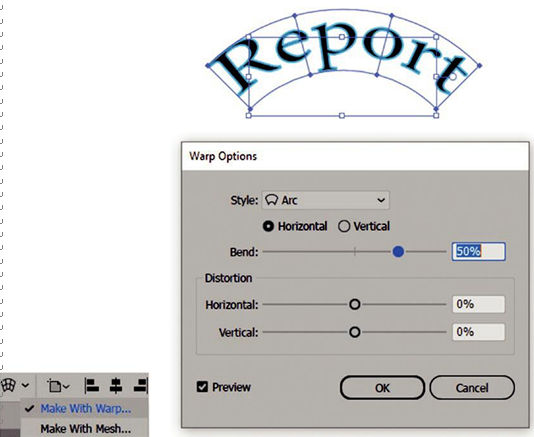
Figure 8-161. From the Control panel, use Warp Options dialog box when you want to alter the style of some text
Refer to the following dialog box when your text is selected, and click the warped icon in the Control panel and experiment with various settings and sliders.
The last section of the Control panel, as mentioned earlier, is useful when working with the Selection tool and type if you need to align or distribute your multiple selections of text or individual text to the reference point, x and y coordinate values, or adjust width
(W) and height (H) and constrain proportions with the link icon. Refer to Figure 8-162.
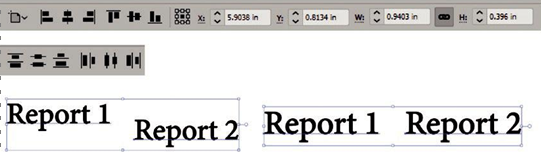
Figure 8-162. Use the Control panel to align, distribute, and move selected text
Remember that text, while selected with the Selection tool, can be moved, scaled, and rotated. Shift+Click to select multiple selections of text. Alt/Option+Drag text to create a copy. And while an area of text is selected, you can use the Backspace/Delete key to remove it.