After typing with the Type tool, the Touch Type Tool can be used on individual fonts in a word to cause different alignments and baselines for each letter. Select a letter in a word, and using the bounding box around the selected character, you can move, rotate, enlarge, or scale a separate the letter. Though keep in mind that for not all text or topics would this be a good ideas as your chart heading may start to resemble a ransom note, which does not look very professional. For a less serious topic in a different font surrounded by a related graphic, it might be quite acceptable. Refer to Figure 8-144.
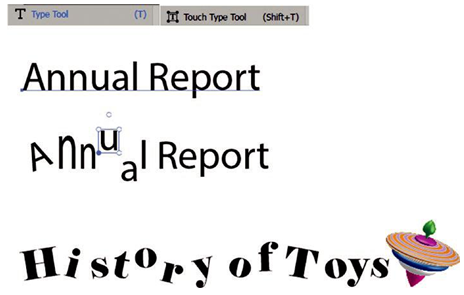
Figure 8-144. Use the Type tool then the Touch Type tool to edit individual characters on the point or path
Use Edit ➤ Undo or your History panel if you need to undo some steps. If you would like more details on this tool, refer to the following link:
https://helpx.adobe.com/illustrator/using/tool-techniques/touch-type-tool.html
Control Panel, Properties Panel, and Related Panels for Type
The Control panel can now be used to edit selected text in the following ways, and similar options can be selected in the Properties panel if you prefer to use it instead.
Note that the Control panel will change slightly based on whether you have selected text using the Selection tool (Type Options) or used your Type tool (Character Options) to highlight individual characters in the text. To find additional panel options in the Properties panel, click the ellipsis (…). Refer to Figure 8-145.
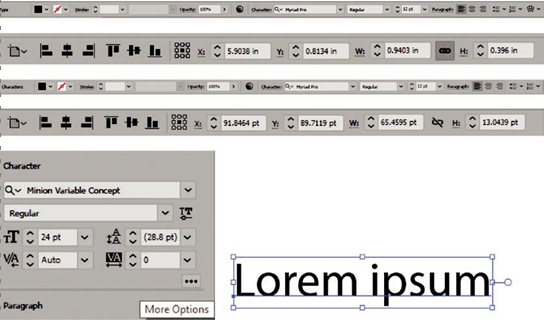
Figure 8-145. Use the Control panel or Properties panel while text is selected to edit your type and access other panels
You should be already familiar with most of the settings in the Control panel for alignment; however, this time they are specifically for the type area and aligning a type area with other paths. We will mainly focus on the new settings.
With type, like any shape, you can set its fill and stroke color. Note that by default, a font will be typed without a stroke and only a color fill, which can be altered from the drop-down panel. Refer to Figure 8-146.
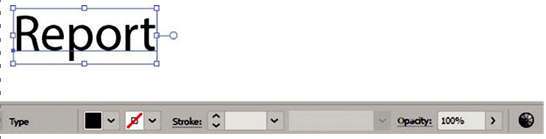
Figure 8-146. Selected text and the Control panel
If you add a stroke color to a letter or the whole selection, you can then access the Stroke panel to adjust the stroke weight and stroke panel and variable width profile (uniform) for those letters that contain the stroke. Refer to Figure 8-147.
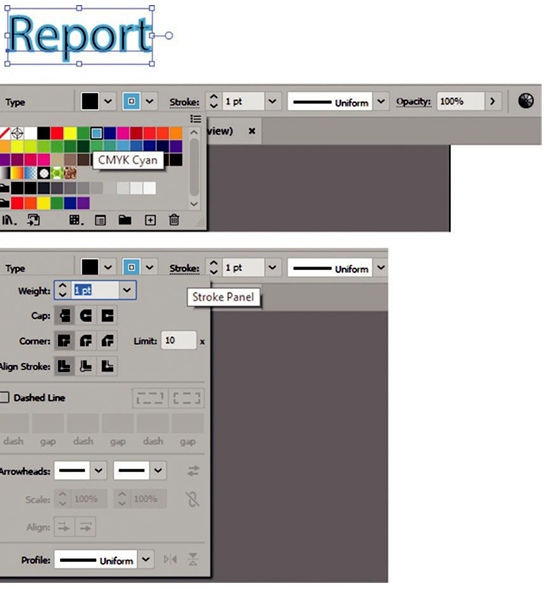
Figure 8-147. Use the Control panel; change the fill, stroke, and stroke weight of a text; and access the Stroke panel
From here, you could even make the line around the letter dashed, if required, and lower the weight of the stroke to 0.5pt so that the fill is more visible. Here it is shown with and without the dashed line. Refer to Figure 8-148.

Figure 8-148. Use the Stroke panel to make text dashed or solid; some stroke colors are more visible when dashed
Tip Using a stroke, the same color as the font can make it appear bolder.
From the Control panel, you can also set the overall transparency or opacity (0%–100%) and use the Recolor options we discussed earlier in the chapter. See earlier section “Recolor.” Refer to Figure 8-149.

Figure 8-149. Use the Control panel to add opacity or recolor your text